Canva is a free online design tool that allows you to create stunning graphics for various purposes. Whether you want to make a YouTube thumbnail, an Instagram post, a presentation, or a blog banner, Canva has you covered. In this article, we will show you how to use Canva to design your own graphics in a few easy steps.
In this article, we first show you what Canva is, how you can create an account and different parts of the app. After this, we begin to deep dive into some further features of Canva, showing you the possibilities of what can be done. In a later section, we list some keyboard shortcuts that can enhance you productivity. To wrap up, we provide a 6 step process to quickly get started so the adventurous busy man can quickly get their hands dirty.
Let’s get started.
What is Canva?
Canva is a platform that offers thousands of templates, photos, elements, and fonts to help you create professional-looking graphics. You can use Canva for any project, such as social media, websites, blogs, presentations, cards, flyers, posters, logos, and more. Canva is also compatible with different devices, such as desktops, laptops, tablets, and smartphones.
Canva has two versions: a free version and a paid version called Canva Pro. The free version gives you access to over 250,000 templates, 5GB of cloud storage, and hundreds of thousands of free photos and graphics. The Canva Pro version gives you more features, such as unlimited storage, premium templates, photos, and graphics, custom fonts and logos, one-click resizing, and more. You can try Canva Pro for free for 30 days before deciding if you want to upgrade.
Canva has an Android, iOS, desktop and web-based version. In the course of this article, our focus would be on the web-based version.
How to Create an Account in Canva
To start using Canva, you need to create an account first. You can sign up with your Google, Facebook, or email account. It’s super easy and takes only a few minutes. Once you sign up, you can access the Canva homepage, where you can see different sections to help you navigate the platform.
The different sides of Canva
The Canva homepage shows you different sections that can help you find and create designs faster and easier. The sections enable you to easily find templates based on their categories and what you intend to create if you dont want to search for them. Here are some of the sections you should know about:
- For you: This section shows you personalized suggestions based on your previous designs, preferences, and trends. You can find templates, photos, videos, and other resources that match your needs and style. You can also see the latest features and updates from Canva in this section.
- Docs: This section shows templates for creating proposals, briefs, reports and other documents.
- Whiteboards: This section displays templates that can help in making flowcharts, organograms, mind maps, vision boards and other similar diagrams.
- Presentations: On this section, you find templates for working with power point presentations.
- Social Media: This is where you find templates to use on various social media platforms. Whether it is Instagram reels, LinkedIn cover page, Facebook stories and several others. Whatever content you want to create for social media, you can find templates that can help you get the job done.
- Websites: On this section, you would find website UI templates that can be used for different kind of website you want to create – Portfolio, Business, Event, every type of template is available to use and tweak.
- And there is more, you can find templates for Book covers, Infographics, Photo Collages, Desktop Wallpaper, Zoom virtual background, Planner, Invoice and several others.
- Brand kit: This section is only available for Canva Pro users. It allows you to create and manage your own brand identity. You can upload your logos, choose your brand colors, and select your brand fonts. This way, you can keep your designs consistent and professional across different platforms and projects.
The Projects Section in Canva
On the left side of the screen, you find Projects listed in the navigation menu. When it is clicked, you are redirected to another page where you can see all recent designs and a feature to organize your designs into folders. Canva already does this automatically by grouping images and videos that has been uploaded into different sections.
You can create as many folders as you want and name them according to your needs. For example, you can create folders for different social media platforms, such as Instagram, YouTube, and Pinterest. You can also create folders for different types of projects, such as presentations, flyers, posters, and logos.
To create a folder, you can click on the “Create a folder” button at the top of the folders section. You can then type in the name of the folder and click on the “Create” button. To add a design to a folder, you can click on the three dots icon at the top right corner of the design thumbnail and select “Move to folder”. You can then choose the folder you want to move the design to.
To access a folder, you can simply click on the folder name and see all the designs inside it. You can also edit, delete, rename, or share the folder by clicking on the three dots icon next to the folder name.
Using folders can help you save time and avoid clutter. You can easily find the design you are looking for without scrolling endlessly. You can also keep your designs neat and tidy.
On the navigation menu, you can see options for Your projects which on clicking it just displays designs you have worked on and the Shared with you section shows you the designs that other people have shared with you. You can collaborate with your team members, clients, or friends on the same design. You can also give and receive feedback, make edits, and download or share the final design.
Finding Templates in Canva
One of the best features of Canva is that it offers a huge variety of templates for different types of graphics. You can find templates by using the search bar at the top right corner of the homepage. Just type in what you are looking for, such as “Instagram post”, and you will see a list of options to choose from. You can also browse templates by category, such as social media, personal, business, education, marketing, and more. You can find the categories by clicking on the “Templates” menu at the left side of the page.
To use a template, simply click on it and it will open in a new tab. You can then customize it to suit your needs.
How to Choose a Template and Use the Editor in Canva
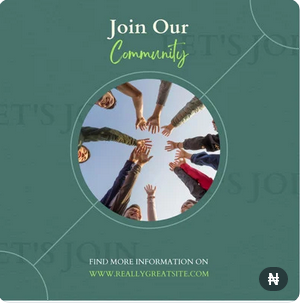
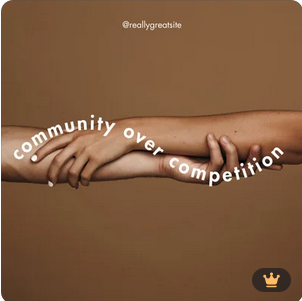
After you have found a template or a custom size that you want to use, you can start designing your graphic in Canva. You can choose a template from the homepage, the search bar, or the tabs above the search bar. You can also copy an existing design from your designs section. To choose a template, simply click on it and then a popup that shows the Customize button displays on the screen. If you are using the FREE version of Canva, you need to make sure there is no paid tag on the template you want to use. Examples of paid templates are shown below.
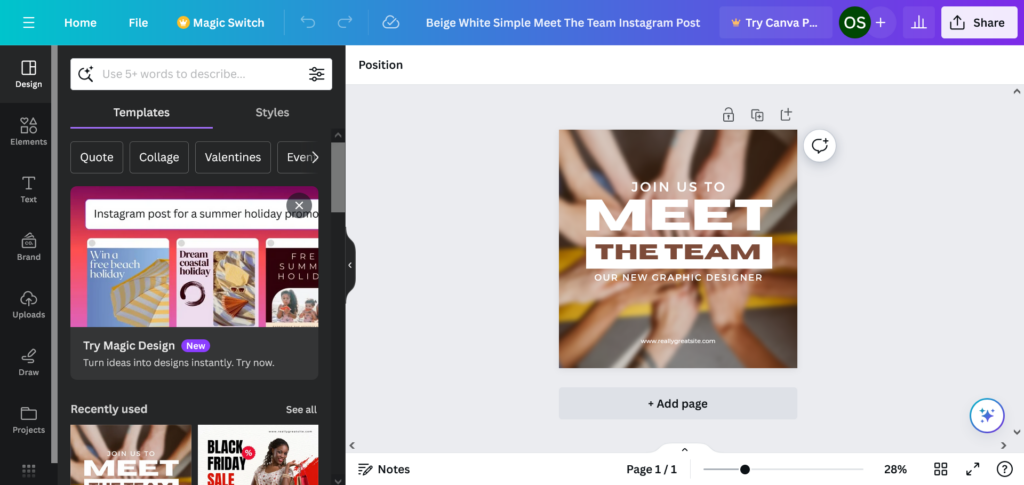
Clicking on the Customize button takes you the editor page on a new tab on your browser. The editor is where you can customize your design and add your own content. The editor has different panels and tools you can use to create your graphic. Here are some of the main features of the editor:
- Top panel: This panel has buttons that allow you to access different functions, such as:
- Home: This button takes you back to the homepage.
- File: This button lets you create a new design, save your current design, view the version history, save to a folder and download or print your design.
- Magic Switch: The Magic Switch button allows you translate the content of the design into a different language or turn your design into another format like a blog post, email or other kinds of document.
- Undo/Redo: The undo and redo buttons allow you go back or forward to changes you have made during the design. A keyboard shortcut for undo is Ctrl+Z and for redo, it is Ctrl + Shift + Z.
- The Next button after that lets you know if changes to design are been saved.
- On the next section you can rename your design into something else as depicted below.
- Share: This button lets you share your design with others, either by sending a link, inviting people by email, publishing to social media or other platforms or downloading it.
- Left panel: This panel shows you the templates, photos, elements, text, videos, and other resources that you can use in your design. You can drag and drop them onto your canvas or click on them to add them. You can also search for more resources by using the search bar at the top of the panel.
- Canvas: This is the main area where you can see and edit your design. You can zoom in or out, move around, and select or deselect items on the canvas. You can also use the toolbar at the top of the canvas to undo or redo your actions, copy or delete items, arrange items, group or ungroup items, crop or flip items, and lock or unlock items then change colors of elements and fonts of texts.
When you are done working on your designs, the next step is to name and download your design and start sharing.
Naming and Downloading Your Designs in Canva
The last steps in creating a design in Canva are to name and download it. These are important steps to keep your designs organized and ready to use. Here is how to do them:
- Name: You should give your design a descriptive and unique name that reflects its purpose and content. This will help you find it easily in your designs section and avoid confusion with other designs. To name your design, you can click on the name field in the top panel and type in the name you want. You can also add a date or a category to your name for more clarity.
- Download: You should download your design in the appropriate file type and quality for your intended use. For example, if you want to print your design, you should download it as a PDF. If you want to share it online, you should download it as a PNG or JPG. To download your design, you can click on the “Download” button in the top panel and choose the file type and quality you want. You can also choose to download the whole design or a specific page.
Now, let’s get a bit deeper into using some of the tools Canva provides to craft decent designs. One of such is Templates.
Canva templates are pre-designed layouts that serve as starting points for creating various types of graphics. These templates encompass a wide range of categories, including social media posts, presentations, flyers, and more. By utilizing templates, you can save time and effort in designing you content, as you can simply customize the elements to match your brand or message. Whether you’re a beginner or an experienced designer, Canva templates offer a convenient and efficient way to produce professional-looking graphics without starting from scratch.
How to Choose and Change Templates in Canva
One of the advantages of using Canva is that it offers a huge variety of templates for different types of graphics. You can choose a template that suits your purpose and style, and then customize it to make it your own. You can also change the template if you want to try a different design or theme.
To choose a template, you can use the left panel in the editor. The first tab in the panel is the templates tab, where you can see different categories and subcategories of templates. You can also use the search bar at the top of the panel to find more templates. To use a template, you can simply click on it and it will replace the current design on the canvas.
To change a template, you can use the same method as choosing a template. You can browse or search for a different template and click on it. This will apply the new template to the current page of your design. You can also see a preview of the template before you apply it by hovering over it.
Some templates are animated or have video elements. You can tell them apart by the video icon on the bottom right corner of the template thumbnail. You can use these templates to create more dynamic and engaging graphics.
Uploading Your Own Media in Canva
Another feature of Canva is that it allows you to upload your own media, such as images, videos, and audio. You can use your own media to personalize your design and add more variety and creativity. You can also access your uploaded media from any device and any design.
To upload your own media, find the Uploads tab in the left panel and click on it. You can either drag and drop your files from your computer or click on the “Upload media” button and choose the files you want to upload. You can upload images, videos, and audio files in different formats and sizes.
Once you upload your media, you can see them in the uploads tab. You can also sort them by date, name, or type. To use your uploaded media in your design, you can drag and drop them onto the canvas or click on them to add them. You can also edit, delete, or rename your uploaded media by clicking on the three dots icon at the top right corner of the media thumbnail.
You can also connect the upload tab to suites of other apps like Facebook, Instagram, Google Drive, Dropbox and Google Photos. When you connect these apps to Canva, you are able to import media contents from the apps into Canva. You would have to give Canva permission to access your account before the connection can be successful.
Note: There is a section below the left panel that provides a list of all connected apps and you can view it. To add new apps, the app menu on the left panel shows the list of apps you can add. For instance, if you need to get images from external sources, visit the apps section and on Discover tab search Pixabay and you would be able connect it. After the connection, you can visit the tab where Pixabay is located at the bottom of the left panel and then use a text to find the particular picture you are looking for.
More in the Photos Tab
Another resource that Canva offers is the photos tab. This tab gives you access to a huge library of stock photos that you can use in your design. You can find photos for different themes, topics, and styles. You can also search for photos by using keywords or filters. If you dont already see the photos tab in the left panel, you can click on the apps section and then under More from Canva find Photos click so it would be listed.
To use the photos tab, after you click on it, you can then scroll through the photos or use the search bar at the top of the panel to find what you are looking for. To use a photo in your design, you can drag and drop it onto the canvas or click on it to add it. You can also edit, delete, or replace the photo by using the right panel or the toolbar.
Some photos are free to use, while some are premium and require a Canva Pro subscription. You can tell them apart by the watermark or the crown icon on the bottom right corner of the photo thumbnail. If you use a premium photo in your design, you will have to pay for it or upgrade to Canva Pro to download or print your design.
Canva Pro gives you unlimited access to all the photos in the library, as well as other features and benefits. You can try Canva Pro for free for 30 days and see if it suits your needs. Canva Pro costs 2,800 per month in Nigeria, which can be worth it if you use a lot of photos in your designs.
Using the photos tab can help you to find and use high-quality and relevant photos for your design. You can also combine the photos with the templates, elements, text, and other resources that Canva offers.
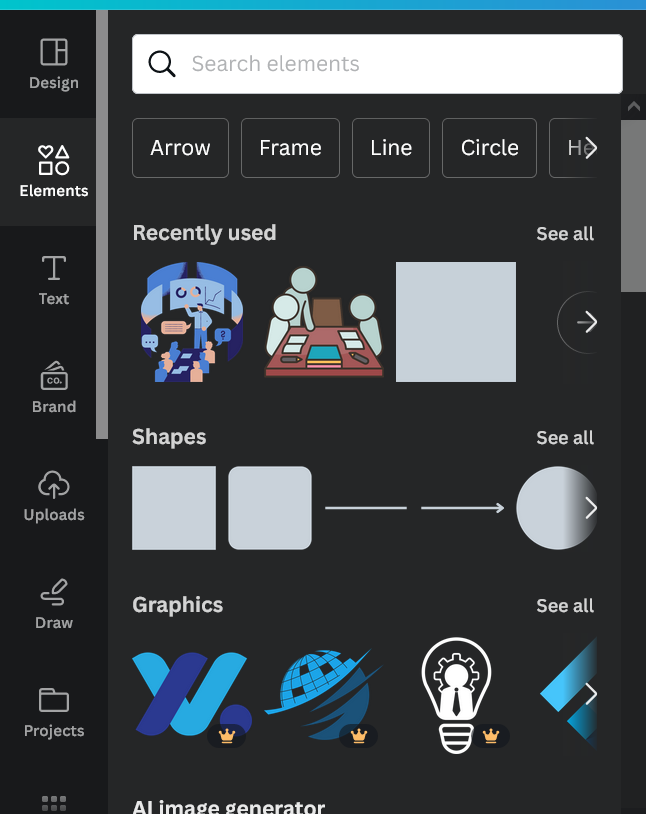
Using the Elements Tab in Canva
The last resource that Canva offers is the elements tab. This tab gives you access to a wide range of graphics, icons, shapes, lines, frames, and other elements that you can use in your design. You can find elements for different themes, topics, and styles. You can also search for elements by using keywords or filters.
To use the elements tab, you can click on the second tab in the left panel after the Design Tab. You can then scroll through the elements or use the search bar at the top of the panel to find what you are looking for. To use an element in your design, you can drag and drop it onto the canvas or click on it to add it. You can also edit, delete, or replace the element by using the right panel or the toolbar.
Some elements are free to use, while some are premium and require a Canva Pro subscription. You can tell them apart by the watermark or the crown icon on the bottom right corner of the element thumbnail. If you use a premium element in your design, you will have to pay for it or upgrade to Canva Pro to download or print your design.
Frames, Stickers, Charts, and Gradients in the Element Tab
The elements tab also has some other types of graphics that you can use in your design, such as frames, stickers, charts, and gradients. These are some of the ways you can use them:
- Frames: Frames are graphics that have a transparent area where you can insert a photo. You can use frames to create mockups, collages, or interesting effects. To use a frame, you can drag and drop it onto the canvas or click on it to add it. You can then drag and drop a photo from the photos tab or the uploads tab onto the frame. You can also double-click on the photo to adjust its position and size within the frame. You can also edit, delete, or replace the frame or the photo by using the right panel or the toolbar.
- Stickers: Stickers are animated graphics that can add some motion and fun to your design. You can use stickers to create GIFs or videos, or to spice up your static graphics. To use a sticker, you can drag and drop it onto the canvas or click on it to add it. You can also edit, delete, or replace the sticker by using the right panel or the toolbar. You can also preview the animation of the sticker by clicking on the play button at the bottom of the canvas.
- Charts: Charts are graphics that can help you to display data in a visual and clear way. You can use charts to create reports, infographics, presentations, or other types of graphics that involve data. To use a chart, you can drag and drop it onto the canvas or click on it to add it. You can then edit the data, the type, the color, and the style of the chart by using the right panel. You can also edit, delete, or replace the chart by using the right panel or the toolbar.
- Gradients: Gradients are graphics that have a smooth transition of colors. You can use gradients to create backgrounds, effects, or accents for your design. To use a gradient, you can drag and drop it onto the canvas or click on it to add it. You can then change the colors, the direction, and the transparency of the gradient by using the right panel. You can also edit, delete, or replace the gradient by using the right panel or the toolbar.
You can also use the Magic Media app to generate images and videos with texts. You enter a description of the image or video you want to generate in the text box and allow Canva generate a unique image for you. The image that is generated is always based on your prompting and with better prompting comes a better image. For every image that is generated, it costs 1 credits. Each account is given 50 credits to use and when that is exhausted, they would have to join Canva Pro to get more. Canva Pro subscribers can get as much as 550 credits every month.
The Text Tab
This tab give you access to different types of text you can use in your design. You can find text formats – headings, subheadings, body texts and then templates you can pick and add to your canvas so you can use in your design.
To use the text tab, you can click on its tab in the left panel. You can then choose from the basic text options, such as heading, subheading, or body text. You can also choose from the font combinations, which are pre-made text styles that match well together. To use a text option, you can drag and drop it onto the canvas or click on it to add it. You can then edit the text, the font, the color, the size, and the alignment by using the right panel or the toolbar.
You can combine your text styles with the templates, photos, elements, and other resources that Canva offers.
The Editor Page
The main part of the Canva interface is the editor, where you can see and edit your design on the canvas. You can also use the pages feature to create and manage multiple pages in your design. Here are some of the things you can do with the editor and the pages:
- Editor: The editor is where you can see your design on the canvas and make changes to it. You can use the top panel and the toolbar to edit the elements, photos, text, music, and other resources that you have added to your design. You can also the zoom buttons at the bottom of the canvas to adjust the view. You can also use the view button to change how your pages are arranged, then the full screen button shows your design in full screen.
- Notes: You can add notes to your pages to communicate with others or remind yourself of something. To do this, you can click on the notes icon at the bottom left part of the screen and type in the notes you want.
- Pages: The pages feature allows you to create and manage multiple pages in your design. You can use this feature to create graphics for different platforms or purposes, such as Instagram carousels, presentations, or e-books. To use the pages feature, you can use the page panel at the bottom of the editor. You can then do the following things within the pages:
- Title: You can give your pages a title to identify them and keep them organized. To do this, you can click on the title field at the top of the page panel and type in the title you want.
- Move: You can move your pages up or down to change their order. To do this, you can use the arrows at the top of the page panel to move the current page up or down. You can also drag and drop the pages in the page panel to rearrange them.
- Duplicate: You can duplicate your pages to create a copy of them. To do this, you can click on the duplicate icon at the top of the page panel. This will create a duplicate page next to the current page.
- Lock: By clicking this button, you can secure the content on a page and make it un-editable.
- Delete: You can delete your pages if you don’t need them anymore. To do this, you can click on the delete icon at the top of the page panel. This will delete the current page from your design.
- Add: You can add new pages to your design if you want to create more graphics. To do this, you can click on the add page icon at the end of the page panel. This will add a blank page next to the current page.
Some actions that you can perform on elements
- Adjust: You can adjust the size, position, rotation, color, transparency, and cropping of the elements by using the top panel or the toolbar after you have clicked on that element. You can also use the handles on the corners and sides of the elements to resize and rotate them. You can also double-click on some elements to edit their shape or content.
- Ungroup: You can ungroup some elements that are composed of multiple parts, such as text styles, font combinations, or stickers. To do this, you can right-click on the element and select “Ungroup”. This will separate the element into its individual parts, which you can then edit, delete, or move independently.
- Info: You can get more information about the element, such as the author, the keywords, the price, and the likes. To do this, you can click on the info icon at the top right corner of the element thumbnail. You can also use this feature to add the element to your likes, view more by the same author, or see magic recommendations.
- Position: You can change the order of the elements on the canvas, such as sending them to the front or to the back. To do this, you can click on the position icon at the top right corner of the element thumbnail. You can then choose from the options, such as forward, backward, to front, or to back. This will change the layering of the elements on the canvas.
Text Actions
The text is the words and letters that you use in your design. Whenever a text is selected in the editor page or canvas, a different top panel shows up specifying different actions that can be performed on the text. Here are some of the actions you can do with the text:
– Copy style: You can copy the style of one text element and apply it to another text element. To do this, you right click on the text from which you want to copy its style and then click on another text element to paste the style. This will change the font, the color, the size, and the alignment of the text element to match the original one.
– Transparency: You can adjust the transparency of the text element, which means how opaque or transparent it is. To do this, after you select your your text, on the top panel, find the options menu represented with a three vertical dots, click on it and then select the transparency. It is also on this section you would find other options like changing the case, adding an underline or strikethrough effect. You can make the text element more transparent by moving the slider to the left, or more opaque by moving the slider to the right. This can create different effects, such as shadows, overlays, or watermarks.
– Uppercase: You can force the text element to be uppercase, which means all the letters are capitalized. To do this, you can click on the uppercase icon in the right panel. This will change the text element to uppercase, regardless of how you typed it. This can create a more bold and impactful look for your text.
– List: You can create a list of items with the text element, either with bullets or numbers. To do this, you can click on the list icon in the right panel. You can then choose between a bullet list or a numbered list. This will add bullets or numbers to each line of your text element. You can also indent or outdent the items by using the arrows in the right panel. This can help you to organize and present your information in a clear and concise way.
Color Actions
Colors are the hues and shades that you use in your design. You can use the colors options to change the colors of the elements, photos, text, and backgrounds in your design. Several ways of changing colors include using the color picker, the color wheel, or the hex code. To change colors, you can click on the element, photo, text, or background that you want to change the color, then click on the text button on the top panel. And the window at the left side that pops up allows us to do the following things:
– Document colors: You can use the document colors feature to choose colors that are used in your design. To do this, you can click on the document colors option in the colors tab. You can then see a palette of colors that are used in your design. You can click on any color to apply it to the element, text, or background that you selected.
– Photo colors: You can use the photo colors feature to choose colors that match the photo in your design. To do this, you can click on the photo colors option in the colors tab. You can then see a palette of colors that are extracted from the photo. You can click on any color to apply it to the element, text, or background that you selected.
– Default colors: You can use the default colors feature to choose colors that are provided by Canva. To do this, you can click on the default colors option in the colors tab. You can then see a palette of colors that are available in Canva. You can click on any color to apply it to the element, text, or background that you selected.
– New color: You can add your own colors and use any color that you want. To do this, you can click on the plus icon under the Brank Kit section and use the color picker, the color wheel, or the hex code to choose any color that you want. You can also adjust the brightness and saturation of the color by using the sliders. Then click on any color to apply it to the element, text, or background that you selected.
Creating Effects
Effects are the options that you can use to add some extra flair to your text, such as shadow, lift, hollow, splice, echo, glitch, or neon. To use the effects, for an image, after clicking on the image, click on the Edit image button at the top panel and you would see the different options listed on the left side of the screen. For texts, after click the text you want to create effects for, you would have to click on Effects button to list the list of effects available. You can then choose from the different effects that are available for your text or image, then use the sliders and the color picker to adjust the settings of the effects, such as the thickness, the offset, the direction, the transparency, the blur, and the color. Here are some of the effects that you can use on a text:
– Shadow: You use the shadow effect to add a shadow to your text, which can create a sense of depth and contrast. You can adjust the transparency, the blur, the direction, and the color of the shadow. You can also use the offset slider to move the shadow closer or farther from the text. Just adjust the different sliders until you get the effect you want.
– Lift: The lift effect allows you to add a blurry background to your text, which can create a sense of elevation and focus. The intensity slider allows you increase the intensity of the effect.
– Hollow: You can use the hollow effect to make your text hollow, which can create a more elegant and minimalist look. You can adjust the thickness of the stroke by adjusting the slider.
– Splice: You can use the splice effect to add a stroke and a fill to your text, which can create a more modern and dynamic look. You can adjust the thickness, the offset, the direction, and the color of the stroke and the fill. You can also use the color picker to choose different colors for the stroke and the fill.
– Outline: This effect allows you add an outline around a text. Then, you can adjust the thickness and color of the outline.
– Echo: You can use the echo effect to add multiple shadows to your text, which can create a more vibrant and energetic look. Then adjust the offset direction, and the color of the shadows. You can also use the offset slider to move the shadows closer or farther from the text.
– Glitch: You can use the glitch effect to add a glitchy and distorted look to your text, which can create a more retro and edgy look. You can adjust the offset, the direction, and the color of the glitch. You can also use the color picker to choose different colors for the glitch.
– Neon: The neon effect allows you to add a neon glow to your text, which can create a more futuristic and flashy look. You can adjust the intensity of the glow with the slider.
– Background: This effect simply adds a background under the text selected and you can change options like roundness, shape, transparency and color of the background with their respective sliders.
The Shape options allow you curve a selected text. This options make it possible to create curvy texts, arrows or shaped that are used as logos or to add uniqueness to a design. And there is an option to use the slider to adjust the curvature of your text.
You can use the curve to create a circle effect for your text, which can create a more symmetrical and balanced look. To do this, you can type in your text, such as your name, your slogan, or your logo. You can then use the curve slider to curve your text along a full circle. You can also use the spacing and the letter height sliders to make your text fit the circle. You can also add an element or a photo inside the circle to create a more interesting design. You can then position and align your text and element on the canvas.
Spacing Options
- Spacing: The spacing is the option that you can use to adjust the spacing between the letters and the lines of your text. To use the spacing, you can click on the spacing tab in the top panel. You can then use the sliders to adjust the letter spacing and the line height of your text. You can also use the arrows to indent or outdent your text. Here are some of the things you can do with the spacing:
- Letter spacing: You can use the letter spacing slider to increase or decrease the space between the letters of your text. This can affect the readability and the appearance of your text. You can make the letter spacing wider or narrower by moving the slider to the right or to the left.
- Line height: You can use the line height slider to increase or decrease the space between the lines of your text. This can affect the readability and the appearance of your text. You can make the line height taller or shorter by moving the slider to the right or to the left.
Grouping two or more elements as one
- Group: The group feature is the option that you can use to group different elements together and move them as one unit. To use the group, you can select the elements that you want to group by clicking and dragging on the canvas. You can then click on the group button that shows up directly on top of the text together with other options like “Magic Write”, “Duplicate” and “Delete” icons. Once you click “Group”, it will group the elements together and create a bounding box around them. You can then do the following things with the group:
- Move: You can move the group as one unit by clicking and dragging on the bounding box. This will move all the elements in the group together. You can also use the arrows on the keyboard to nudge the group in different directions. You can also use the snap and guides features to align and position the group on the canvas.
- Resize: You can resize the group as one unit by using the handles on the corners and sides of the bounding box. This will resize all the elements in the group proportionally. You can also use the shift key to constrain the proportions of the group. You can also use the lock icon to lock the proportions of the group.
- Rotate: You can rotate the group as one unit by using the handle on the top of the bounding box. This will rotate all the elements in the group together. You can also use the shift key to snap the rotation to 15-degree increments. You can also use the rotate icon to rotate the group by 90 degrees clockwise or counterclockwise.
- Ungroup: You can ungroup the group and separate the elements by clicking on the ungroup icon at the top of the canvas. This will ungroup the elements and remove the bounding box. You can then edit, delete, or move the elements independently.
- Align to a Page: You can align the selected elements to align properly, whether to the left, right, center, top, bottom or middle. Alignment is a key part of design and this particular feature in Canva allows you to align your elements without having to use your eye to determine items’ alignment.
- Duplicate: Suppose, you would like to make you of the same pattern of a design, you can duplicate that pattern and make changes as necessary. This option makes that possible.
- Delete: This is for deleting the grouped elements totally and removing them from the canvas.
There are other options available like copying the selected elements, commenting, copying style and locking. You can explore these options observe the effects.
Aligning Objects in Canva
The alignment option is the feature you can use to position and resize your elements on the canvas. You can use them to create a more balanced and professional look for your design. You can also use them to save time and effort when editing your elements. Here are some of the things you can do with the alignment and the alt key in Canva:
- Alignment: The alignment is the option that you can use to align your elements to the canvas, to the margin, or to other elements. To use the alignment, you can click on the element that you want to align and then navigate to the menu icon shown after “delete” icon. On clicking the icon, you would see “Align Elements” shown as on of the options displayed. You can also use the snap and guides features to align your elements automatically when you drag them on the canvas. Here are some of the things you can do with the alignment
- Align to canvas: You can align your element to the center, the top, the bottom, the left, or the right of the canvas. To do this, you can click on the entire canvas and then also click on the element(s) you would like to align to canvas icon. Then select which option of alignment you want to use. This will move your element to the desired position on the canvas.
- Align to margin: You can align your element to the margin of the canvas, which is the recommended space that Canva shows for the specific resolution of your design. To do this, you can drag your element on the canvas and look for the solid line that indicates the margin. This will snap your element to the margin of the canvas.
- Align to other elements: You can align your element to other elements on the canvas, such as the center, the middle, the top, the bottom, the left, or the right of another element. To do this, you can drag your element on the canvas and look for the dashed line that indicates the alignment. This will snap your element to the alignment of another element.
Linking in Canva
Linking is one feature you can use to organize and connect your elements in your design. You can use it to create a more neat and interactive content.
You can use to add a link to your element, such as a website, a social media page, or an email address. To use the link, you can click on the element that you want to add a link to and then click on the menu icon after the “delete” icon that appears on top of the selected element. One of the options displayed when the menu is clicked is Link. After clicking it, you can then enter the link that you want to add or select one suggested for you which is a list of your previous documents in your workspace. When you select the page you want, wait for the next pop up and choose the one of the Display modes(embed or link). Click DONE and then the link would be added. This will add a link to your element, which will be clickable when you export your design as a PDF or a website. This can help you to create a more interactive and engaging content for your audience.
Working with Animation and Video in Canva
Animation
Animation in Canva adds a dynamic dimension to your designs, allowing elements to come alive with movement and interactivity. With Canva’s animation feature, users can create engaging graphics, presentations, social media posts, and more, by incorporating animated elements such as text, illustrations, and icons.
To use the animation, you can click on the element that you want to animate and then click on the animate icon at the top of the canvas. You can then choose from the different animation options that are available for your element, such as fade, rise, bounce, tumble, or slide. You can also use the slider to adjust the speed of the animation. You can also use the play icon to preview the animation on the canvas. Then, you can use the advanced animation options to animate different elements separately or together. You can use the page animation options to animate the whole page or a whole design.
Video
Canva provides a fine-drawn video editing tool. With this feature, users can effortlessly transform their ideas into stunning visual stories, whether for social media, presentations, marketing campaigns, or personal projects.
The video is the option that you can use to add a video to your design, either from Canva’s library or from your own uploads. To use the video, you can click on the video tab in the left panel. You can then browse or search for the video that you want to use. You can also filter the video by categories, colors, or licenses. To use a video, you can drag and drop it onto the canvas or click on it to add it. You can then edit the video by using the right panel or the toolbar. Here are some of the things you can do with the video:
– Trim: You can trim your video to remove unwanted parts or to fit a specific duration. To do this, you can click on the trim icon at the top of the video. You can then drag the handles to adjust the start and the end of the video. You can also use the play icon to preview the trimmed video on the canvas.
– Flip: You can flip your video horizontally or vertically. To do this, you can click on the flip icon at the top of the video. You can then choose between the horizontal flip or the vertical flip. This will flip your video along the horizontal or the vertical axis. This can help you to change the orientation or the direction of your video.
– Crop: You can crop your video to remove unwanted parts or to fit a specific shape or size. To do this, you can click on the crop icon at the top of the video. You can then drag the handles to adjust the crop area. You can also use the lock icon to lock the aspect ratio of the video. You can also use the flip icons to flip the video horizontally or vertically. You can also use the rotate icons to rotate the video by 90 degrees clockwise or counterclockwise.
– Filter: You can filter your video to change the mood, the tone, or the style of your video. To do this, you can click on the filter icon at the top of the video. You can then choose from the different filter options that are available for your video, such as epic, festive, grayscale, or cross process. You can also use the slider to adjust the intensity of the filter. You can also use the advanced options to adjust the brightness, the contrast, the saturation, the tint, the blur, and the vignette of your video.
The Canva Magic Studio
Canva Magic Studio is a suite of AI-powered tools that are integrated into Canva, the online design platform. You can use Canva Magic Studio to create, edit, and visualize content with the help of AI. For example, you can:
- Generate custom images and videos from text or media with Magic Design and Magic Media.
- Resize, reformat, and translate your designs for different platforms and languages with Magic Switch.
- Edit and enhance your photos with Magic Expand, Magic Grab, Magic Edit, Magic Eraser, and Background Remover.
Canva Magic Studio is designed to make the design process faster, easier, and more creative. You can access all the AI tools from within the Canva editor, and use them with your own media or Canva’s library of templates, photos, fonts, icons, and more.
To use Canva Magic Studio, you need to have a Canva Pro account, which is a subscription service that gives you unlimited access to Canva’s features and resources. You can sign up for Canva Pro for free for 30 days, and then pay a monthly or yearly fee.
Some Canva Shortcuts that can help improve productivity
There are common actions that can help speed up and enhance your design process easily. You can also use them to create more stunning and professional images. Here are some of the things you can do with the shortcuts:
– Copy: You can copy an element or a group of elements by pressing and holding the Ctrl key and the C key on your keyboard. This will copy the element or the group of elements to your clipboard. You can then paste them to another place on the canvas or to another design.
– Paste: You can paste an element or a group of elements that you have copied by pressing and holding the Ctrl key and the V key on your keyboard. This will paste the element or the group of elements to the place where you have clicked on the canvas or to another design.
– Duplicate: You can duplicate an element or a group of elements by clicking on the duplicate icon at the top of the canvas or by pressing and holding the Ctrl key and the D key on your keyboard. This will create a copy of the element or the group of elements on the canvas.
– Undo: You can undo an action that you have performed by clicking on the undo icon at the top of the canvas or by pressing and holding the Ctrl key and the Z key on your keyboard. This will revert your design to the previous state before the action.
– Redo: You can redo an action that you have undone by clicking on the redo icon at the top of the canvas or by pressing and holding the Ctrl key and the Y key on your keyboard. This will restore your design to the state after the action.
– Link: You can add links with the Ctrl + K keys on your keyboard.
– Delete: Press the delete key on the keyboard to delete an element.
Work with Canva in 6 STEPS
Canva is a powerful and easy-to-use graphic design platform that allows you to create stunning visuals for your social media platforms. Whether you want to create a Facebook post, a Twitter post, or an Instagram post, Canva has you covered with its one-click resize feature, its vast library of photos and logos, and its customizable brand colors.
In this article, we have shown you some important features about Canva. As we begin to wrap up, in this section we a 6 step process of making the most of Canva on Social media to create different social media posts.
Step 1: Sign up for Canva Pro
To access all the features that Canva has to offer, you will need to sign up for Canva Pro. Canva Pro is a subscription service that gives you unlimited access to millions of photos, fonts, icons, logos, templates, and more. You can also create folders within the Canva editor to organize your designs and access them anytime.
To sign up for Canva Pro, you can go to and click on the “Try free for 30 days” button. You will need to enter your email address and a password, or you can sign up with your Google or Facebook account. You will also need to enter your payment details, but you can cancel anytime before the trial ends.
Step 2: Choose a template or start from scratch
Once you have signed up for Canva Pro, you can start creating your social media posts. You can either choose from thousands of ready-made templates that Canva offers, or you can start from scratch and create your own design.
To choose a template, you can browse through the categories on the left side of the Canva editor, or you can search for a specific keyword in the search bar. For example, if you want to create a Twitter post, you can type “Twitter” in the search bar and see all the templates that are optimized for Twitter.
To start from scratch, you can click on the “Create a design” button on the top right corner of the Canva editor, and choose the dimensions that you want for your design. For example, if you want to create a Twitter post, you can choose the “Twitter Post” option, which has the dimensions of 1024 x 512 pixels.
Step 3: Add and edit elements to your design
Once you have chosen a template or a blank canvas, you can start adding and editing elements to your design. You can add photos, text, shapes, icons, logos, and more to your design by dragging and dropping them from the left side of the Canva editor.
To edit an element, you can click on it and use the toolbar on the top of the Canva editor to change its size, color, position, alignment, transparency, and more. You can also use the keyboard shortcuts to perform common actions, such as copying, pasting, deleting, undoing, and redoing.
One of the best features of Canva is the one-click resize feature, which allows you to resize your design for different social media platforms with just one click. For example, if you have created a design for Instagram, and you want to use it for Twitter, you can simply click on the “Resize” button on the top left corner of the Canva editor, and choose the “Twitter Post” option. Canva will automatically create a copy of your design and resize it to fit the Twitter dimensions. You can then edit the copy as you wish, and save it as a separate design.
Step 4: Save and share your design
When you are happy with your design, you can save and share it with your audience. You can download your design as an image file (such as JPG, PNG, or GIF) or a PDF file, by clicking on the “Download” button on the top right corner of the Canva editor. You can also choose the quality and format of your file, and whether you want to compress it or not.
You can also share your design directly to your social media platforms, such as Facebook, Twitter, Instagram, Pinterest, and more, by clicking on the “Share” button on the top right corner of the Canva editor. You can also share your design via email, link, or embed code, or you can invite others to view or edit your design.
Step 5: Turn Your Designs into Templates in Canva Pro
One of the coolest features of Canva Pro is that you can turn any of your designs into templates and reuse them for future projects. This can save you a lot of time and effort, especially if you have a consistent style or theme for your social media posts.
To turn your design into a template, you need to click on the three dots icon on the top right corner of the Canva editor, and select “Save as template” from the drop-down menu. You can then choose a folder where you want to save your template, or create a new one. You can also add a name and a description for your template, and choose who can access it: only you, your team, or anyone with the link.
Once you save your design as a template, you can access it from your homepage, under the “Your templates” section. You can also browse through other templates created by other Canva users, and use them for your own projects. To use a template, you just need to click on it, and it will open a copy of the design in the Canva editor. You can then edit the template as you wish, and save it as a new design.
Step 6: Share Your Designs to Your Social Media Platforms
After you have created your design using a template or from scratch, you can share it directly to your social media platforms, such as Facebook, Twitter, Instagram, Pinterest, and more. This can help you streamline your content creation process and reach your audience faster.
To share your design to your social media platforms, you need to click on the “Share” button on the top right corner of the Canva editor, and select the platform you want to share to. You will need to connect your Canva account to your social media account first, if you haven’t done so already. You can also enter a caption for your post, and choose when you want to publish it: now, later, or schedule it for a specific date and time.
Once you share your design to your social media platforms, you can track its performance and engagement using Canva’s analytics tools. You can see how many views, likes, comments, and shares your post has received, and use this data to improve your future posts.
Conclusion
Now, it is your turn. Based on all we have shown in this article, go and ahead and keep trying it out. Dont be afraid to break things. The good news is when it breaks you can always undo and keep going.
